
There are several different types of layer, each of which is explained below. We’ll use an example image by way of illustration.

Layers in Butterfly Image

Butterfly
Each layer in the image appears as a separate row in the stack. Four pieces of information are associated with each layer:
- an eye icon: this can be turned on and off to show or hide the layer.
- an icon indicating the type of layer. Image layers display a thumbnail of the content of the layer. This can be displayed in one of three sizes.
- the name of the layer. Photoshop will name layers automatically but it’s very good practice to give your layers meaningful names. It’s surprisingly easy to get mixed up when you have several.
- a padlock icon indicates the layer is locked. The Background layer is always locked and you are able to lock any other layers you wish.
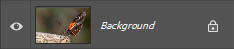 Background layer
When a RAW image (or a jpg) is opened in Photoshop for the first time, it will appear on a single layer known as the background layer. This layer can be adjusted in various ways but the content of the layer can’t be moved. The padlock icon indicates that the layer is locked. It will always appear at the bottom of the layer stack. It is possible to convert this to an ordinary image layer. It’s a good idea to duplicate this layer before any editing takes place, so that an original version of the image file is always available.
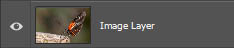 Image layer
As the name suggests, image layers contain visible pixels. In this case, it is a copy of the Background layer.
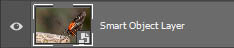 Smart Object layer
A Smart Object layer is identified by a small icon at the bottom right of the thumbnail icon. Smart objects are highly useful to preserve the quality and flexibility of your image. Pixels in Smart Objects can’t be changed directly and any adjustments made are added to the layer as a smart filter. This means that your image data isn’t degraded and you are also able to re-adjust your edits at any time.
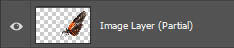 Image layer (Partial)
This layer also contains pixels but only the butterfly is visible as it was ‘cut out’ from the previous layer. The rest of the layer is transparent.
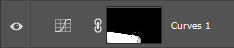 Adjustment layer
This type of layer allows adjustments to be made to the image layer or layers below. No pixels are changed in the image layers affected so there is no degradation of the image. Additionally, adjustments can be edited at any point in the editing process. In this example, a Curves layer has been added to darken the post on which the butterfly is sitting.
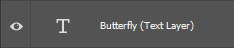 Text layer
This contains text oddly enough! Text can be manipulated in many ways including choice of typeface, style, colour and size. It’s also possible to apply a range of effects including dropdown shadows, bevelling, outlining etc. A text layer can be moved anywhere on the canvas, enabling text to be positioned very precisely.
 Empty layer
In the first instance these contain no content. You can then add any content you might choose. Examples include frames and borders, lines, arrows, boxes and any content added using Photoshop brushes.
Helper Layers: These are temporary layers whose only purpose is to assist your editing. One example is the addition of a high contrast Levels adjustment layer to highlight sensor spots in the sky. These layers can be deleted after they have served their purpose.
The Active Layer: This isn’t really a type of layer. It is the currently selected layer and will be highlighted in a lighter grey background. Click on any layer to make it the Active Layer. In the example above, the Smart Object layer is the Active layer.