
The following example illustrates how layers can be combined to create a finished image.
Layer 1


This is the initial image after minimal editing in Lightroom. The Background layer was created automatically when the image was opened in Photoshop.
Layer 2


Layer 3


A Black and White adjustment layer was added to convert the image to monochrome. A sepia tone was selected.
Layer 4
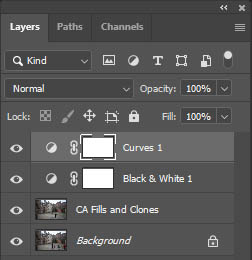

A Curves Adjustment layer was added to increase contrast.
Layer 5


Next, a Levels Adjustment layer was added and midtones were lightened to bring out more detail in the gentleman’s coat. The Layer Mask was inverted from white to black, concealing the entire layer. A white brush was then used to reveal only the coat. (You’ll find out more about Layer Masks later in the course!)
Layer 6


A texture overlay layer was added. Note the blend mode now says Multiply. This darkens the image and adds some aging effects.
Layer 7


A Hue/Saturation adjustment layer was added. Lightness was reduced to darken the entire image. Black paint was applied to the layer mask to conceal the darker tones in the centre of the image, thereby creating a vignette.
Layer 8


Finally, a text layer with an appropriate font was selected to add a title.