What the script does
The KaleidoSquare script creates a 4-way symmetrical version of itself and then duplicates and rotates that through 360 degrees. You can select the number of ‘mirrors and choose from 3 different types of rotation.
The Start Menu
The Start Menu allows you to set a variety of parameters or you can go with the default values (shown in brackets after each option). When you select an option, you must also click on OK to open the relevant dialogue. For example, if you click on ‘Mirrors (6)’, that box will then be checked, but you must also click ‘OK’ to display the Mirrors dialogue.
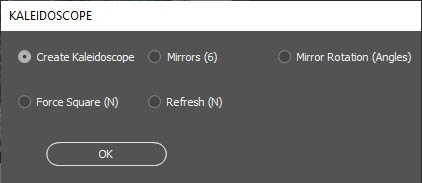
Create Kaleidoscope
Click this when you are happy with the selected options. The script will move on.
Mirrors (6)
This determines the number of duplicates or ‘mirrors’ in your final image. Any number between 3 and 90 will work but factors of 360 give the most regular (but not necessarily the most interesting!) results. Numbers between 6 and 20 tend to work well. Too many mirrors usually results in a muddled mess of brightness!
Mirror Rotation (Angles)
There are three options all of which will give a different result:
- Centre: This rotates the base image using the centre point as the point of rotation.
- ‘Ext Mirrors x2‘ and ‘Ext Angles x2‘ use an external rotation point on the outside of the base image. This requires a rotation of 720 degrees to complete the kaleidoscopic effect. This means either doubling the number of mirrors or doubling the size of the required angle.
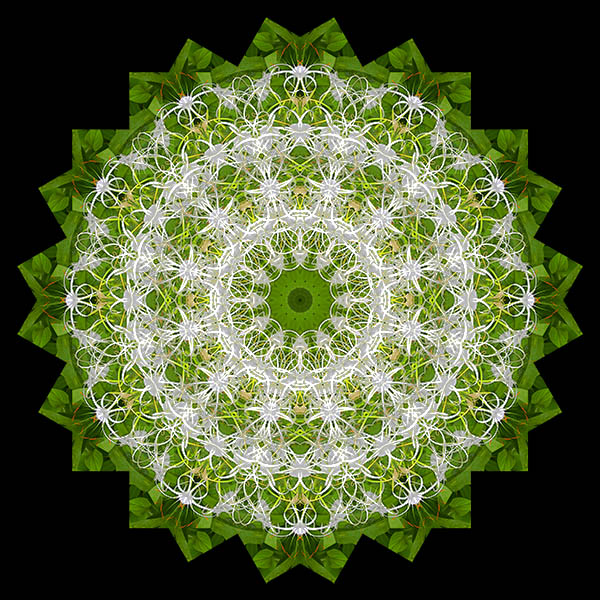
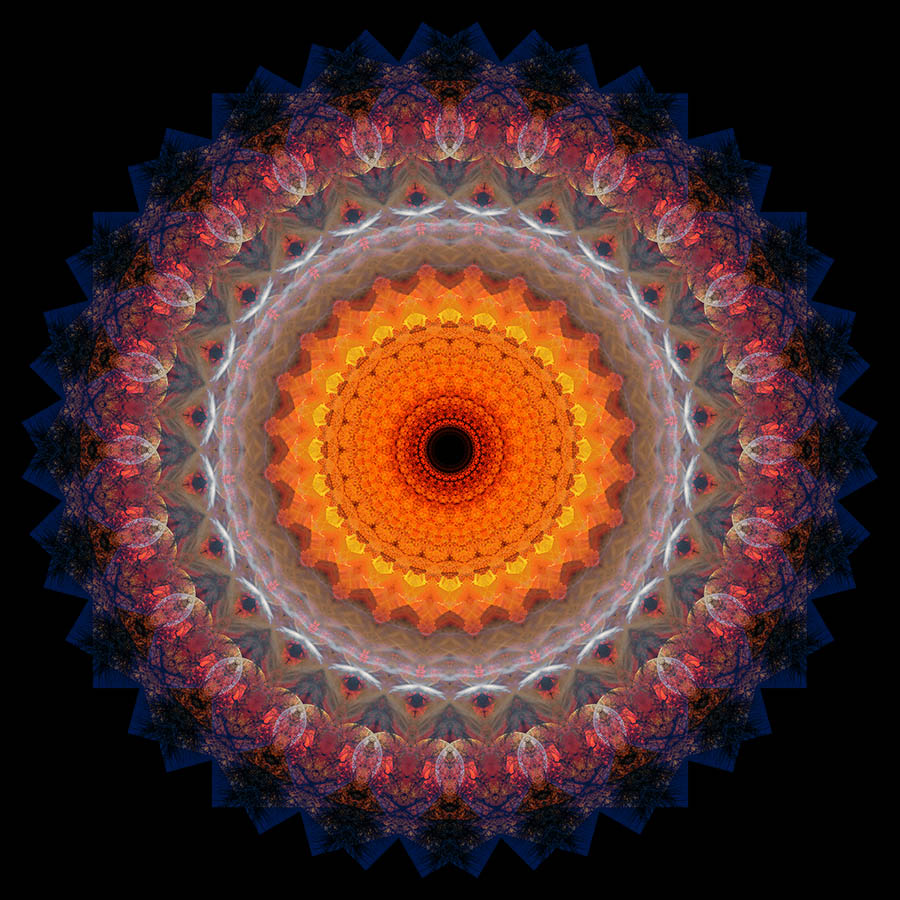
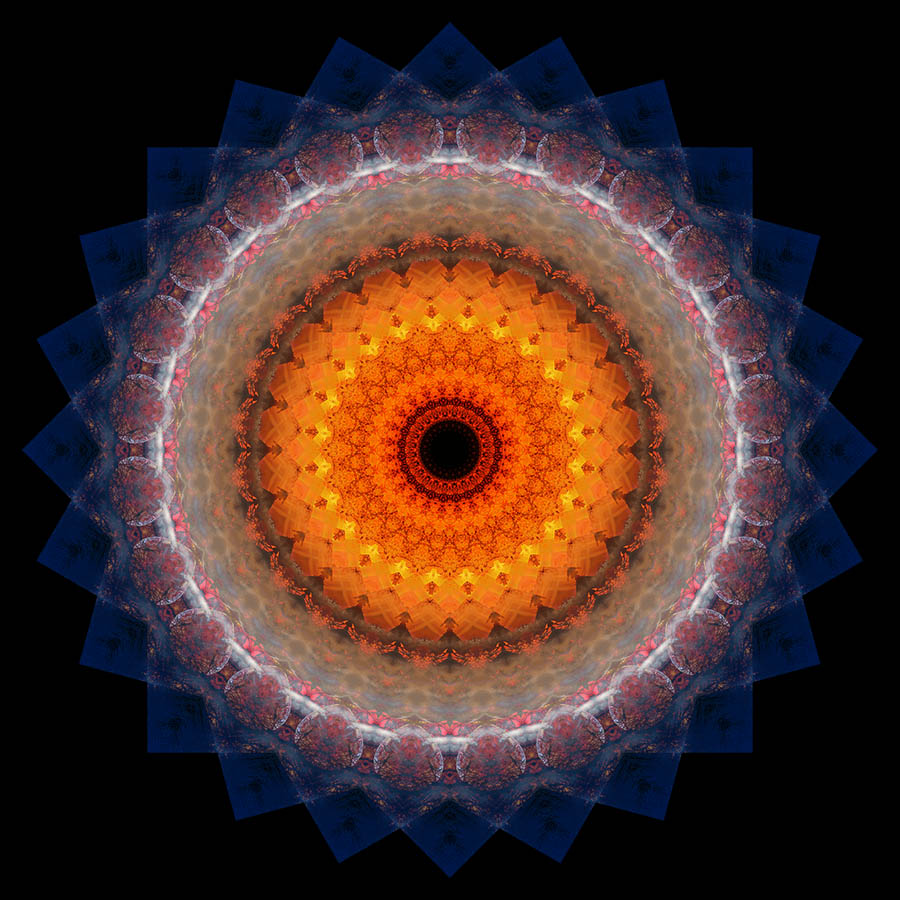
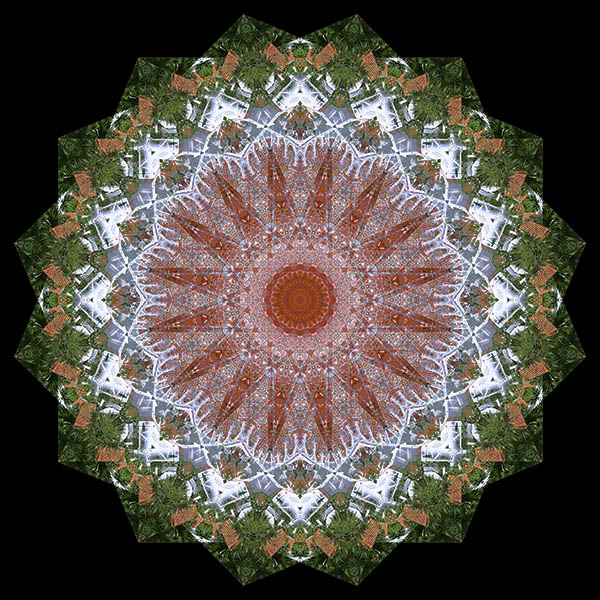
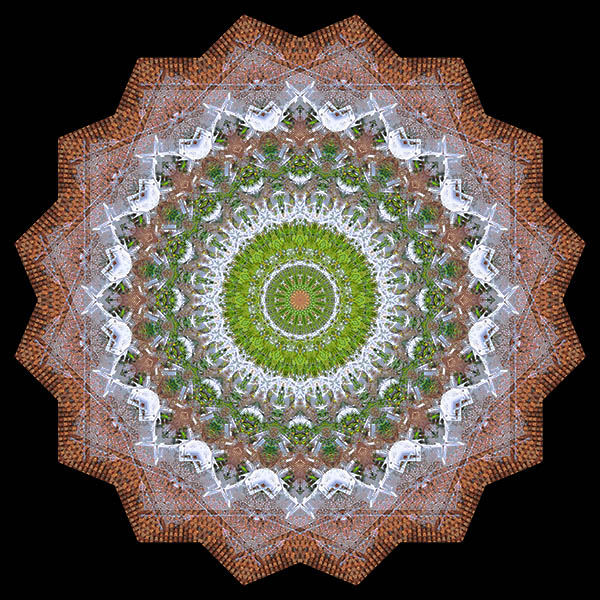
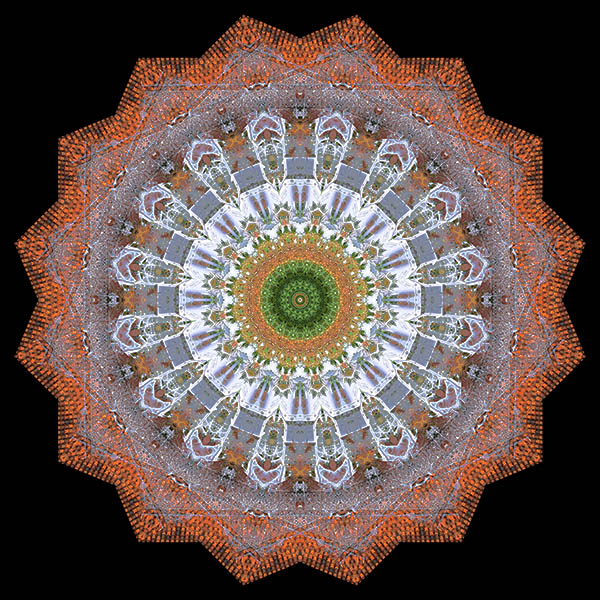
Orchids
The 3 images below were created using exactly the same settings on the Orchids image. All that differed was the Mirror Rotation type.

Rotated around centre
External Rotation – Mirrors x2
External Rotation – Angles x2
Force Square (N)
When ticked, all images will be forced into a square format regardless of their original aspect ratio. This happens BEFORE the 4-way Base Mirror is created. This has the advantage of compressing your image content and will often produce good results. It also works perfectly well when it’s switched off. Regardless of this setting, the final image will ALWAYS be square.
Original Image
Final image – NOT forced square

Original image – squared
Final image – forced square
Refresh (N)
When ticked, the script will update the screen to show every iteration of the kaleidoscope appearing. When switched off, it will go from your original image to the finished result and will only update when the result is complete. The advantage of switching it off is that your final image will be produced much more quickly.
The Base Image
When an image is loaded and you click ‘Create Kaleidoscope’, without further user intervention the script will:
- quadruple the size of the canvas, leaving the original image in the top left quarter of the canvas
- duplicate the image layer and flip it horizontally. This produces 2-way horizontal symmetry
- merge, duplicate and flip vertically these two layers. The image is now 4-way symmetrical and ready to go
This base image will be created in relation to the orientation of your original image. There are 4 possibilities:
- original orientation
- flipped horizontally
- flipped vertically
- flipped both horizontally and vertically
Which you choose will depend on the content of different images. The example below illustrates how different your end results can be by simply flipping the original images.
An Example
The example image is an inner courtyard of Raffles Hotel in Singapore. Every image was processed using exactly the same settings in KaleidoSquare – the only difference was the orientation of the starting image. I added Curves and Hue, Saturation and Luminance adjustment layers to the final images

Original, unflipped image

Flipped horizontally

Flipped vertically

Flipped horizontally and vertically

Base Mirror – original

Base Mirror – flipped H

Base Mirror – flipped V

Base Mirror – Flipped H+V
Final image – original

Final image – flipped H
Final image – flipped V
Final image – flipped H+V
The Finish Menu
When the image is complete, the Finish menu is displayed.
-
- If you wish, you can save the file as a jpg or psd.
- Click Finish to see your image properly and do whatever else you wish to it.
- Clicking Rerun restores the image to the point at which the script was executed and the Start menu is displayed. Any values you changed in previous runs will be preserved.

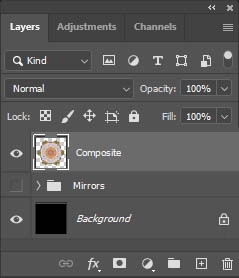
The End Result
The end result will always have the same arrangement of layers:
- a black background layer
- a layer group called Mirrors which is the collection of mirror layers. Visibility is turned off. (I have no idea how to collapse a group with script! I did it manually for the screenshot.)
- a layer called Composite. This is a merged version of the Mirrors layer group ie the entire kaleidoscope.
I left the separate mirror layers as you may wish to mess with the blending options. The Base Mirror layer is set to the ‘Lighten‘ blend mode and this often bleaches out content. It’s sometimes worth trying ‘Darken‘ for example. This will work better with a light background.
Note: Multiple layers can be selected and the blend mode can be applied to all in one operation.